Get RWD Site with Google Site [ The New Google Site Platform ]


Step 1 : Go to Goole Drive from the Web Browser  [ Click Here ]

Step 2 : Press/Click Over New >> More >> Google Sites


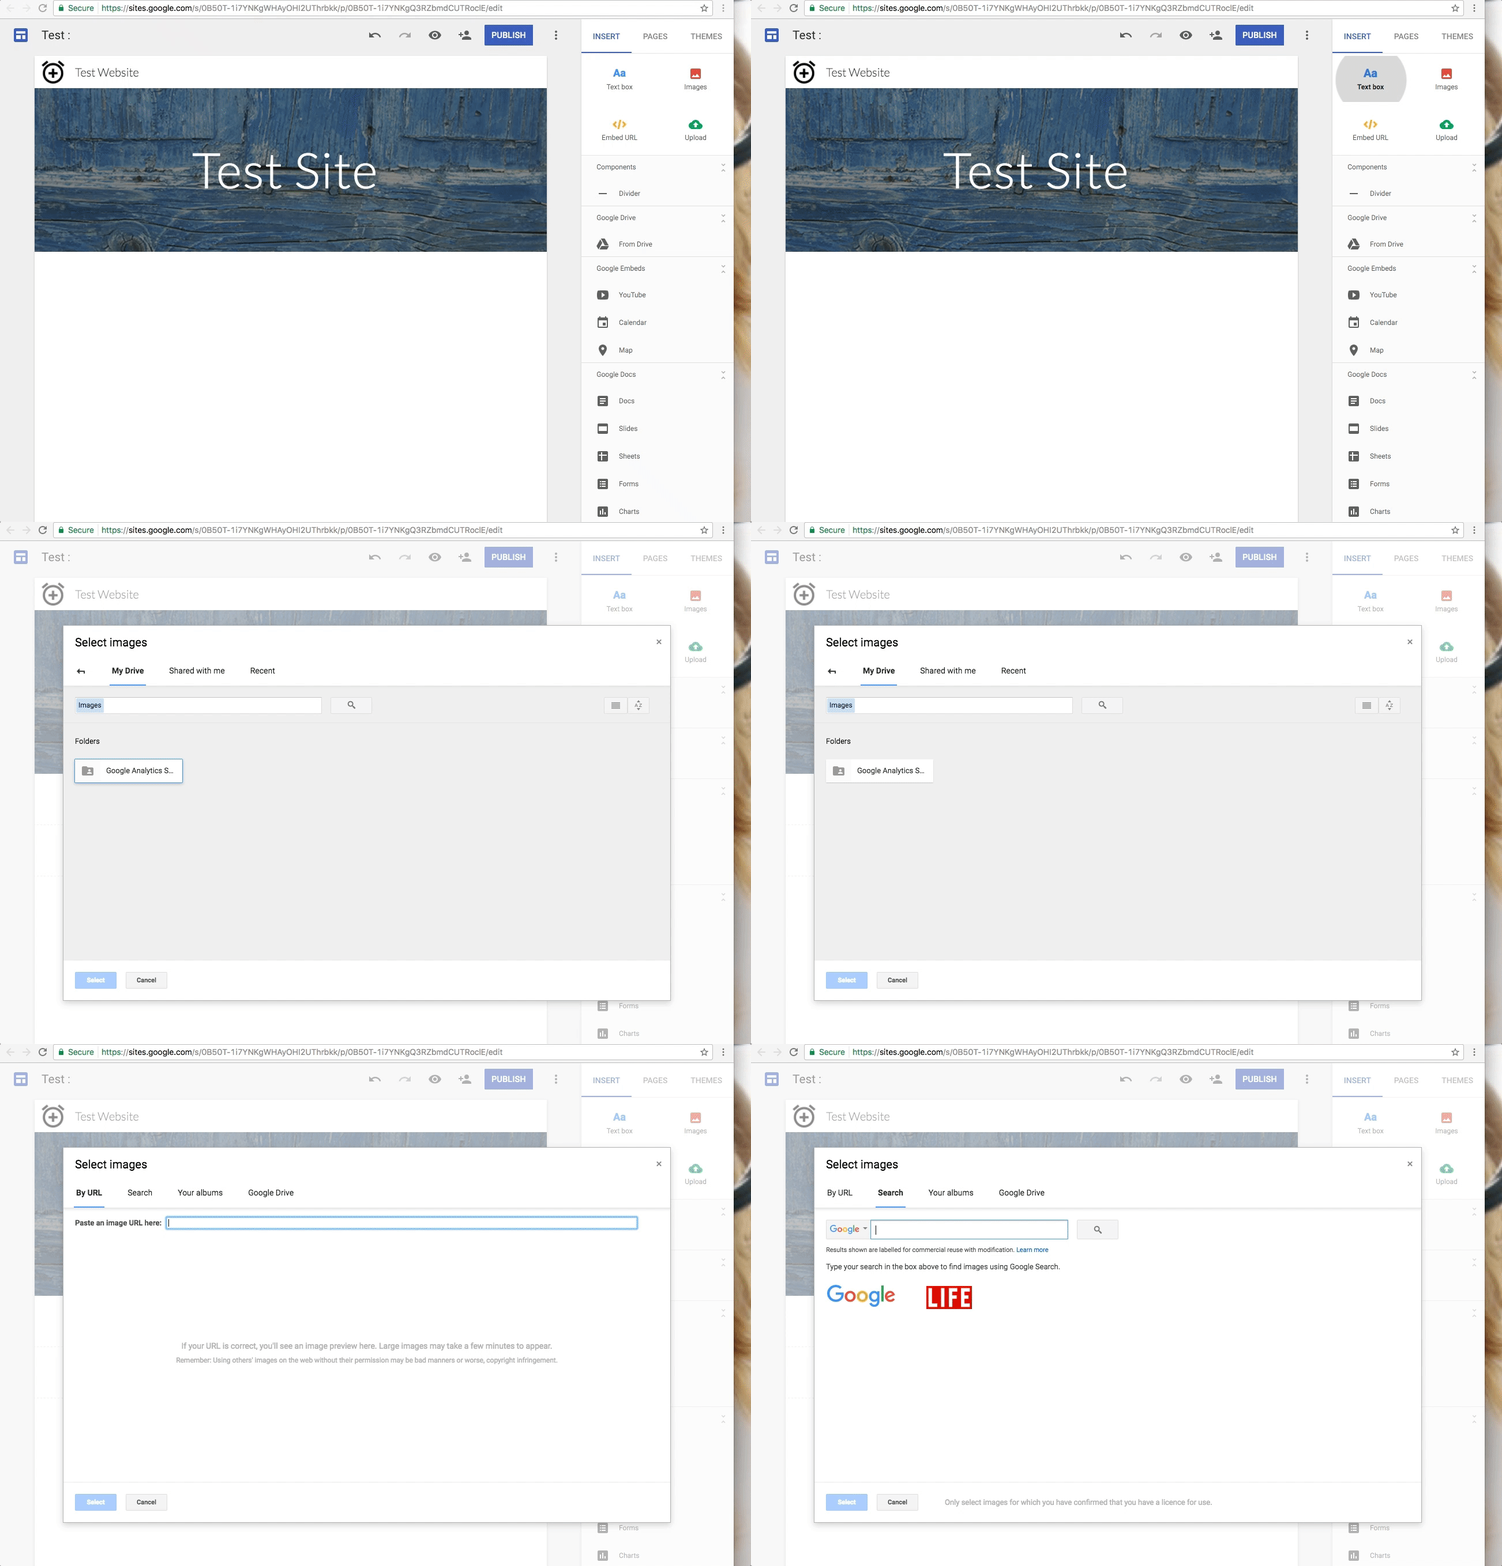
Step 3 : Drag Drop editor Web Builder of Google Site will be appear as following image .


Step 4 : Get familiar with the Google Site Structure, in the below image google site structure of the site.


[1] Website title :  In website title section you may also add an logo to your site with the Title of the page . As shown in the following GIF image .

[2]Headline of the page Section Which some people would call banner or you would find in steps call banners, you can adjust the type of it and what the background of the page to be and type the title you would like to be show as following pictures shows .

Also you can Add in middle of the Image banner the title of the page as shown the step in the gif image. 


[3] Items Sections where you will get your content of your body canvas by drag and drop into this area.


Step 5 :  Press "Publish" button , will pop up a widnow ask you for site location : Type the title of location which would like to appear with . Then select the view properties of your site, if you got Gsuite for education or work you would be able to set for people within your work / school only view or Any one on the wide web . 

If you select wide web, you properly you would like search engine to be able find your site so tick the check box , and finally press "Publish


and now your site is published ðŸ˜‰ .

Comments

Popular posts from this blog

How to Post a Flickr image

In this tutorial will helps in provide you with easy way to post photo within your blog to embed photo into a post. Step 1 : open three apps ( WordPress ,  Flickr , Photos ) Step 2 : Go to Photos Step 3 : select image Step 4 : Tap over Share Step 5 : Tap over Flickr Step 6 : Tap over Post Step 7 : Go to Flickr App Step 8 : Tap over Share icon Step 9 : Tap over Copy URL Step 10 : Go to WordPress App Step 11 : Tap over hyperlink icon Step 12 : Insert link Step 13 : Tap over hyperlink icon again Step 14 : Post the post

How to upload YouTube Video

  Step 1: Go to Youtube.com  Step 2: Click on the Video Camera  ,  Step 3: A sub-menu appears Click on Upload Video  Step 4: Upload Videos screen will appear, Click over Select files  Step 5: Select the video, after the video has been uploaded the following screen will appear  Step 6: Type your title and description, select the thumbnail, then click next  Step 7: The video elements screen will appear as follows  Step 8: Click Next, then checks screen will appear, click next  Step 9 :  A visibility screen will appear, Select from save or publish option Unlisted ,  after  copy the link by click on copy icon, then click save.  And that is how you upload youtube videos into your youtube channel. 

Get your Audio from a website

Step 1: Get Music Saver from Here  Step 2: Music Saver will appear near to the address bar / URL textbox  Step 3: Visit site which you would like to download audio from Step 4: Right Click over the audio and a menu will show up  Step 5: Select  Music Saver icon  Step 6 : A pop-up window with list of audio will show up  Step 7 : Click over the title of the audio and Save file window will appears, Click Save from it.